
Slide deck material or not? In 2025, the answer is simple: anything can become a slide deck. Why not?
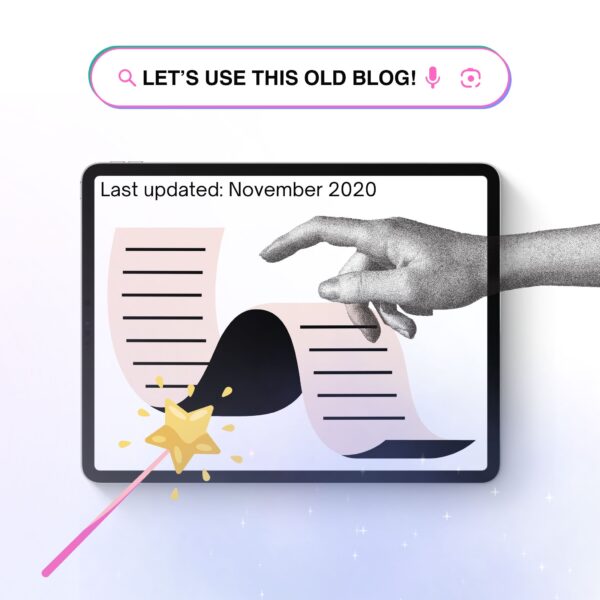
If you’ve ever poured hours into a blog post only to watch it slowly vanish down your site’s archive, you’re not alone. Creating great content is hard work—so why let it have just one life? Repurposing your best blog posts into slide decks is one of the smartest and most overlooked ways to extend your reach, boost your brand’s authority, and get your message in front of new audiences. This short guide will show you exactly how to do it, step by step, using insights from presentation experts, practical examples, and a dash of creative analogy.
If you want to see more creative ways to generate content, visit our Learning Vault for inspiration.
It’s Like Reinventing Something Great
Imagine you’re a baker with a show-stopping signature cake—layered, frosted, and full of flavor. You serve it at a celebration, but after the party, there’s still plenty left. Instead of letting those slices go stale, you crumble the cake, mix in a bit of frosting, and turn it into delicious cake pops or trifles for the next day’s gathering. Suddenly, your hard work delivers twice the value—and even delights a brand new crowd.
The original ingredients (your research, unstructured data, and insights) don’t lose their value; instead, they become more snackable, visually appealing, and perfectly portioned for a different kind of audience.
For businesses—especially those with limited teams—this approach is a no-brainer. If you’ve already invested in creating a high-quality blog, why not extract even more ROI by spinning it into a format that’s ideal for webinars, sales meetings, LinkedIn carousels, or SlideShare?

Blog Post vs. Slide Deck: Understanding the Core Differences
Before you start transforming your blog post, it’s crucial to understand how a slide deck differs from a standard article. Blog posts are built for depth, detail, and SEO—they’re the slow-cooked meals of content. Slide decks, on the other hand, are built for speed, clarity, and persuasion. They need to grab attention, deliver insight fast, and be visually compelling.
Here’s a quick comparison to clarify the differences:
| Content Format | Primary Objective | Core Constraint | Narrative Style | Success Metric |
|---|---|---|---|---|
| Blog Post | Detailed Explanation; SEO Authority | Exhaustive Detail; Word Count | Exploratory; Educational | Organic Rank; Time on Page |
| Slide Deck | Persuasion; Action/Decision | Cognitive Load; Brevity | Rigorous; Action-Oriented | Lead Capture; Funding Secured; Team Alignment |
As explained by presentation strategists, trying to “prove thinking” , ” prove everything” in a slide deck is a common rookie mistake. Instead, your goal is to sell a solution, not just explain a process.
Step-by-Step: How to Repurpose Blogs Into a Slide Deck
1. Define Your Outcome
Start by asking: what do you want your audience to do after seeing this slide deck? Whether it’s booking a call, sharing your insights, receiving an offer for funding, or approving a budget, your desired outcome will shape every slide. Keeping the end in mind helps you avoid unnecessary detail and keeps your narrative laser-focused. Some blogs are already written with an intent in mind, but you can always shift this into any new direction you want if it makes sense to do so.
“… This is important because you’re going to build a slide deck with logic that leads your audience to the conclusion you want.” – Slide Science @ r/powerpoint

2. Summarize Ruthlessly
Read through your blog, highlight only the most essential arguments, and trim the fat. A 1,500-word post might distill down to just 200-300 words of core ideas for your deck — a clear example of how to repurpose blog content efficiently. If a fact or anecdote doesn’t directly support your main outcome, save it for the appendix or speaker notes. And never underestimate the power of an AI summarizer and all the things you can do with it besides presentation decks! You can use the following prompt to turn a blog into the copy for each of your slides:
COPY AND PASTE PROMPT:
Summarize the following blog post into clear, concise slide deck copy.
- Break each major idea or section into a separate slide (start each with a bold, simple headline).
- Use bullet points or short phrases—no long paragraphs.
- Focus on the most essential arguments, data, or takeaways.
- Skip any irrelevant details, anecdotes, or tangents.
- Make sure the language is easy to scan and visually friendly.
[Paste your blog post content here.]
This prompt can work with tools like Aurora (get started for free here), ChatGPT, or Gemini.
3. Structure With Bulletproof Logic
Great slide decks use a logical story arc:
- Situation: What’s the current landscape?
- Complication: What challenge or risk has emerged?
- Resolution: What’s your recommended solution?
This approach grabs attention and keeps the audience engaged, ensuring every slide moves them closer to your call to action. You could try to find the best AI for creative writing, and feed it as “context” your blog to get the best storyline out of it for your presentation.
4. Visualize, Don’t Paralyze
Replace long lists and paragraphs with visuals—charts, diagrams, timelines, and icons. Slides should be easy to scan in seconds. Avoid “presenter props” (text-heavy reminders for yourself) and ban bullet-heavy slides. Instead, group related ideas and use images to reinforce your key points. You can start with what you have, and then do revisions; just get a feel for each slide, and see where it feels like a visual is missing or your attention is fading away.
Instead of bullet points, you could get designer help or use an AI deck builder to produce an alternative like this one Bright Carbon suggests:
5. Slide Deck Design for Cognitive Ease
Keep fonts consistent, limit the number of colors, and use icons that pass the squint-test (they should be clear even from the back of the room). Break complex data into multiple slides—better to have more slides than one overcrowded mess. Another great technique, between presenting big ideas, or heavy information, is to create divider slides. According to Canva this can be done the following way:
“Once you’ve outlined your content plan, give your content a space between them by creating divider slides. These are high impact, easy to understand slides. These could include:
6. Optimize for Distribution
Once your deck is ready, optimize it for platforms like SlideShare, LinkedIn, or your own website. Use keyword-rich titles and descriptions, and always link back to your original blog post for SEO synergy. Place calls to action in the beginning, middle, and end—audiences are impatient, and you never know which slide will capture their attention. You can always embed your presentation into your blog. Beyond visibility, this step helps you repurpose blog content to maximize reach and return on effort. For example, HubSpot recommends:
“… Embed your presentation on your blog and include a blog post link in the description of your SlideShare.
One of the easiest ways to promote your SlideShare is to embed it on your blog. Not only will this help you get leads via the SlideShare itself (more on that below), but the blog post itself should have a CTA on it, too — giving you more opportunities to convert someone into a lead.
Once that blog post is published, make sure you’ve included its link in the description of your SlideShare, too — just another opportunity to get people on SlideShare to visit your website (and hopefully convert).”
Insights from YouTube
A standout resource for creators is the YouTube tutorial “Slide Decks from Blog Content: A How-To Guide.” In this video, the presenter demystifies the process by actually walking viewers through a real transformation. Here are key takeaways:
- Start with a Simple Outline: Break down your blog into major sections, using each as a slide header.
- Make Each Slide a Single Idea: Avoid overcrowding. The best decks have one main point per slide, making them easy to follow and perfect for sharing on social media platforms.
- Use Consistent Visuals: The video shows how using a repeated color palette, icon style, and font creates a professional and trustworthy feel.
- Less Is More: The presenter emphasizes that concise, clear text always outperforms dense slides. Your audience will thank you for clarity.
- Repurpose for Multiple Channels: The deck is not just for live presentations—it can be embedded in blog posts, shared on LinkedIn, or split into Instagram carousels for bite-sized, visual storytelling.
- Call to Action: Every deck needs a strong, direct CTA—don’t be shy about telling your audience the next step.
The video’s practical demonstration makes it clear: you don’t need to be a designer to succeed. With thoughtful content and a commitment to visual clarity, anyone can turn a blog post into an engaging deck.
Watch the full video here:
The Modern Solution for Creative Storytelling
When you’re looking to transform a blog post into a truly engaging slide deck, the right tool can make all the difference. That’s where Aurora Slides comes in. One of the many tools right now redefining AI content creation. Designed for creators, marketers, and professionals alike, Aurora Slides enables anyone to quickly repurpose written content into visually striking, high-impact presentations.
Let’s say you’ve written a detailed blog post about your creative process, a recent project, or even a set of tips for fellow artists. With Aurora Slides, you can easily pull out the blog’s core messages and showcase them as a visual journey—ideal for sharing with clients, galleries, or your online audience. Instead of letting that blog live quietly on your site, you’re giving it new life, new reach, and new energy.
For example, a digital artist might turn a process blog into a “virtual gallery tour,” guiding viewers through each stage of a piece with images, quick captions, and embedded video links—all structured for maximum clarity and visual appeal. But the same approach works for anyone: marketers can pitch campaign strategies, consultants can summarize research, and entrepreneurs can share their origin story. Aurora Slides turns static blog content into an interactive, memorable experience that’s ready for meetings, webinars, social media, or even your next pitch.
In short, tools like Aurora Slides break down the barriers between written content and visual storytelling. These new tools mix the best between AI and Creavity—making it easier than ever to turn your best ideas into slide decks that actually get noticed.
Stay tuned for more updates via our Linkedin:
Reddit Speaks: What the Community Wants You to Know
Sometimes, the best wisdom comes from people in the trenches. On Reddit, professionals and enthusiasts alike are vocal about what makes slide decks (and their creators) stand out:
- Storytelling Is Everything: The consensus is clear—decks that tell a story, not just dump information, are the most persuasive and memorable.
Comment
byu/aakmar from discussion
inconsulting
- Design Polish Goes a Long Way: Even simple slides look professional with clean alignment, even spacing, and minimal copy. The pros recommend learning by copying great decks from scratch.
- Keep Copy to a Minimum: Audiences tune out when slides are wordy. Instead, use single images, minimal text, and let your voice (or speaker notes) carry the details.
Comment
byu/mtdnomore from discussion
inPublicSpeaking
Conclusion: Give Your Best Ideas a Second Life
Don’t let your most valuable blog content gather dust. By turning it into a powerful slide deck, you can extend its reach, connect with new audiences, and drive real results—without doubling your workload. Whether you’re a solopreneur, a marketer, or a creative, this approach is your ticket to working smarter, not harder. So next time you finish a blog post, ask yourself: how can I serve this up in a fresh, irresistible way?
Ready to give your blog content new life? Try Aurora and turn your next post into a powerful deck in minutes!
Frequently Asked Questions (FAQs)
How can Aurora Slides help with deck writing and repurposing blog content?
A: Aurora Slides streamlines the deck writing process by letting you quickly transform blog posts into eye-catching, well-structured slide decks. Its intuitive features and smart templates mean you don’t have to start from scratch—just focus on your key points, and Aurora Slides helps you organize, visualize, and polish your content for any audience. Whether you’re new to deck writing or looking to save time, Aurora Slides is a game-changer for making your message stand out.
What makes a slide deck different from a regular presentation?
A: A slide deck is a collection of slides that tell a story or present an argument, usually in a concise, visually engaging format. Regular presentations can be less structured and often rely more on the speaker’s narration. Slide decks are designed to stand alone, making them ideal for sharing online or as leave-behind materials.
How do I choose which blog post to repurpose?
A: Look for blog posts that cover evergreen topics, perform well in search, or solve specific problems for your audience. Detailed how-tos, data-driven case studies, and thought leadership pieces are excellent candidates for slide decks.
What tools do I need to get started?
A: You can use PowerPoint, Google Slides, or online tools like Canva or Aurora Slides. Many platforms offer AI-powered templates (such as SlidesGPT, Slidesgo, and Aurora Slides) to help you design quickly and professionally.
How do I promote my new slide deck?
A: Share your deck on SlideShare, LinkedIn, Twitter, or your website. Always include a call to action and a link back to your original blog post. Embedding your deck within the blog also boosts SEO and audience engagement.
Can I use the same slide deck for multiple audiences?
A: Absolutely. Just tweak the introduction or call to action to fit each audience (for example, clients vs. internal teams), and you’ll get even more mileage from your content. If you’re dealing with an AI deck generator, then the right prompting will get this done. Take a look at our Google Prompt Engineering Guide Breakdown to unlock better results.